

 1/07/2012 06:48:00 PM
 Photoshop

Stock: gagamitin po natin e2 sa tutorial
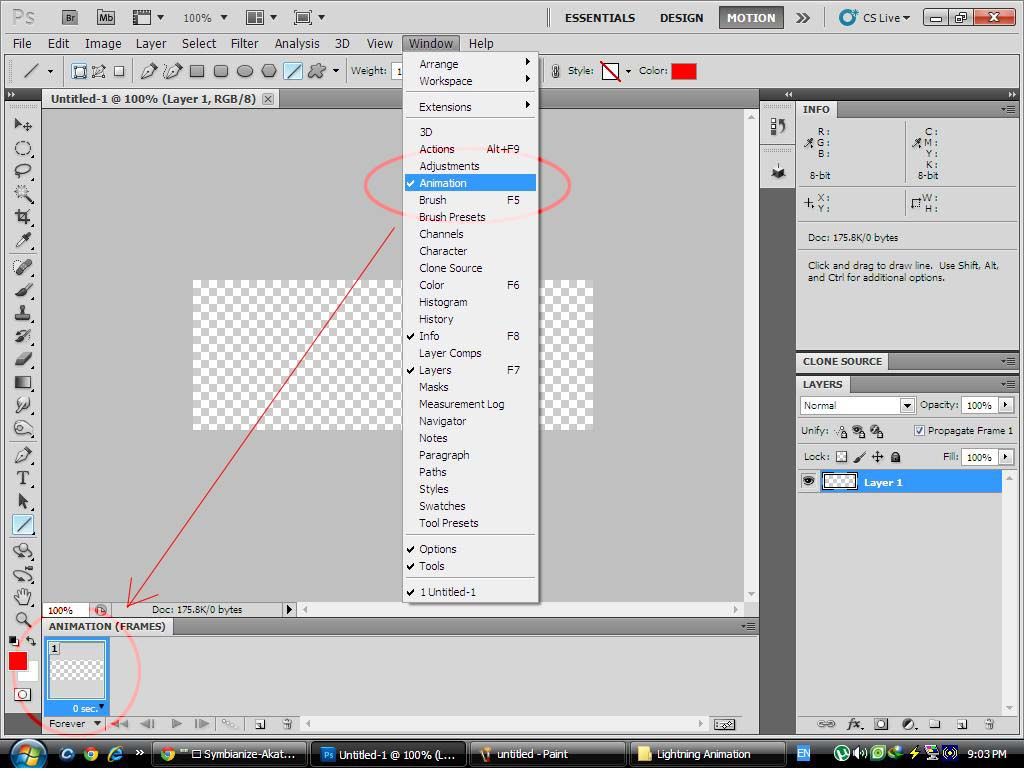
Step 1: Make sure po muna ntin n kasama ang "Animation" sa Window Set natin
See Post #19 kung hindi Frame ang nakikita nyo sa lower-left corner
Create New Document: 400 H x 150 W
| This image has been resized. Click this bar to view the full image. The original image is sized 1024x771. |
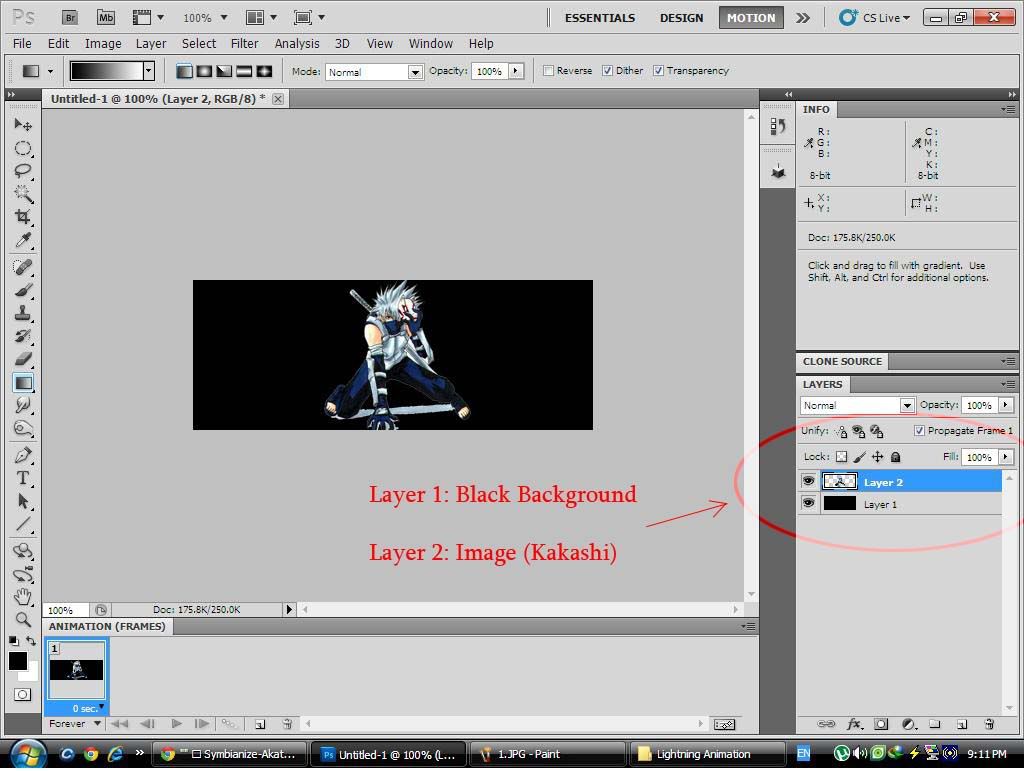
Step 2: Create Layer 1 : fill it with Black Background
Create Layer 2: then ilagay natin si kakashi
| This image has been resized. Click this bar to view the full image. The original image is sized 1024x771. |
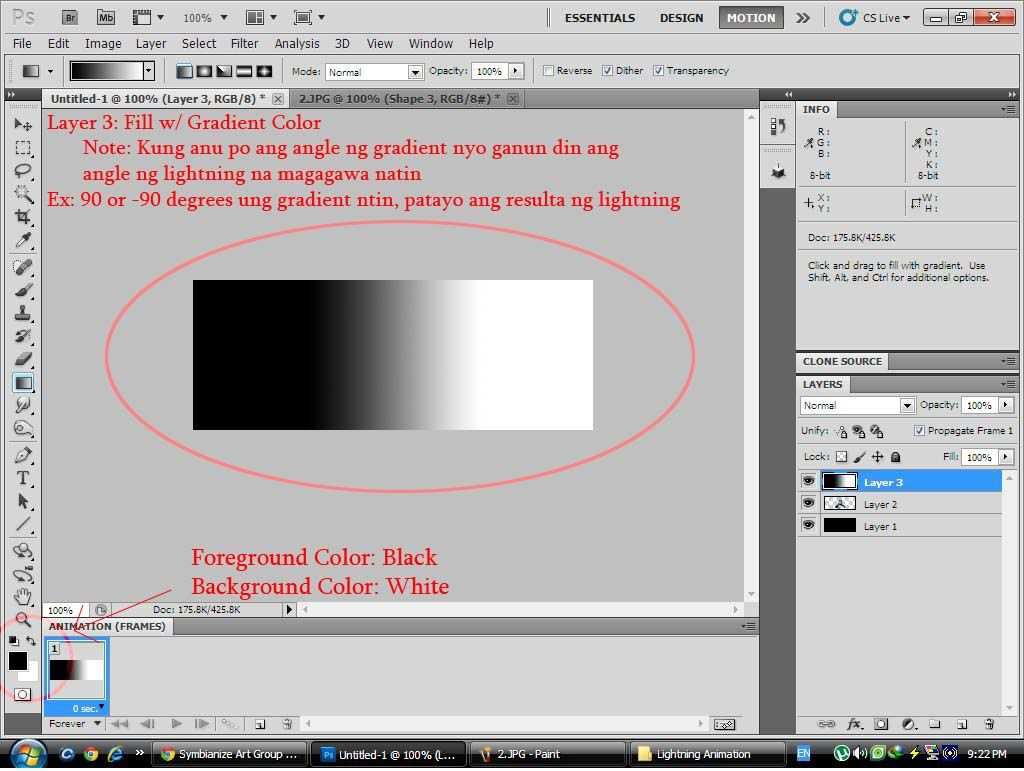
Step 3: Gagawa po tau ng sarili nating lightning, dahil hindi ako gumgamit ng special brushes

Set the colors: Foreground (Black) Background (White)
Create Layer 3: fill it with gradient color
| This image has been resized. Click this bar to view the full image. The original image is sized 1024x771. |
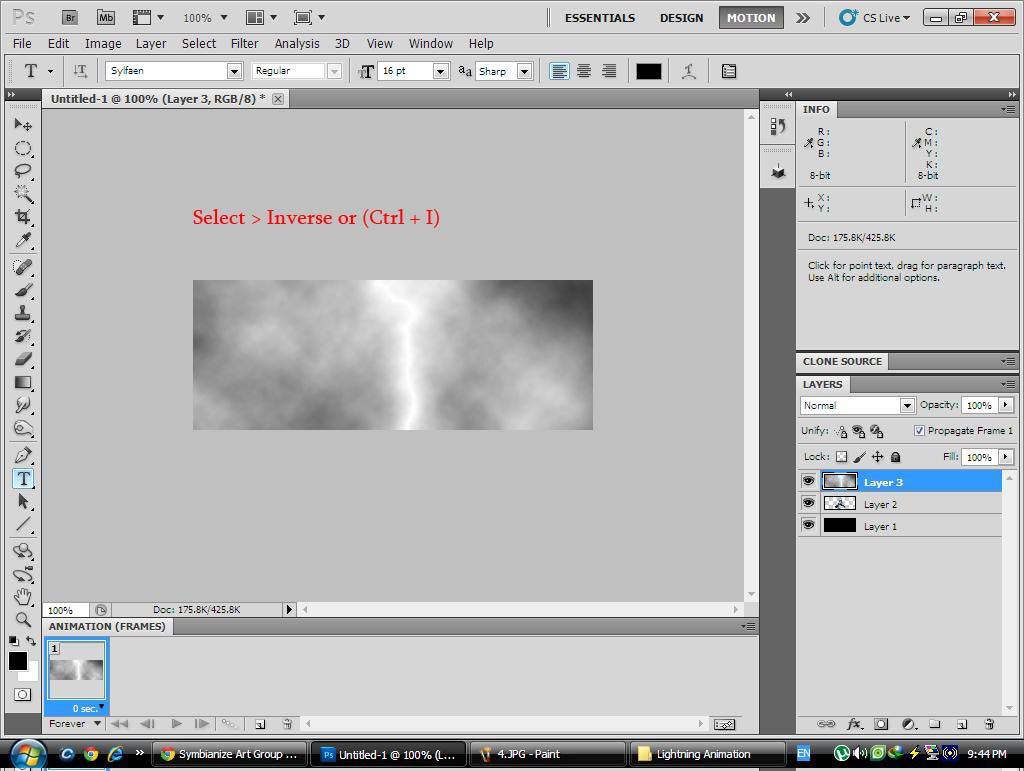
Step 4: Filter > Render > Difference Clouds
| This image has been resized. Click this bar to view the full image. The original image is sized 1024x771. |

Step 5: Select > Inverser or (Ctrl + I) pag d ma-access
| This image has been resized. Click this bar to view the full image. The original image is sized 1024x771. |
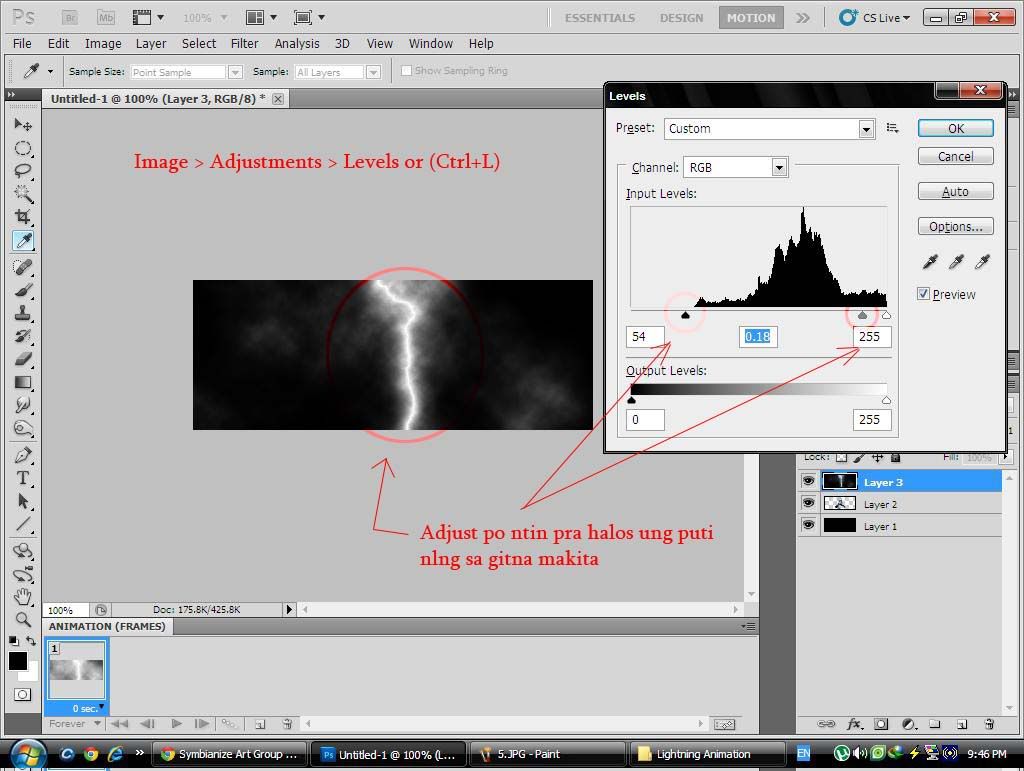
Step 6: Image > Adjustments > Levels or (Ctrl + L)
adjust ntin pra ma emphasize ung puti sa gitna at mawala ung puti-puti sa gilid
| This image has been resized. Click this bar to view the full image. The original image is sized 1024x771. |
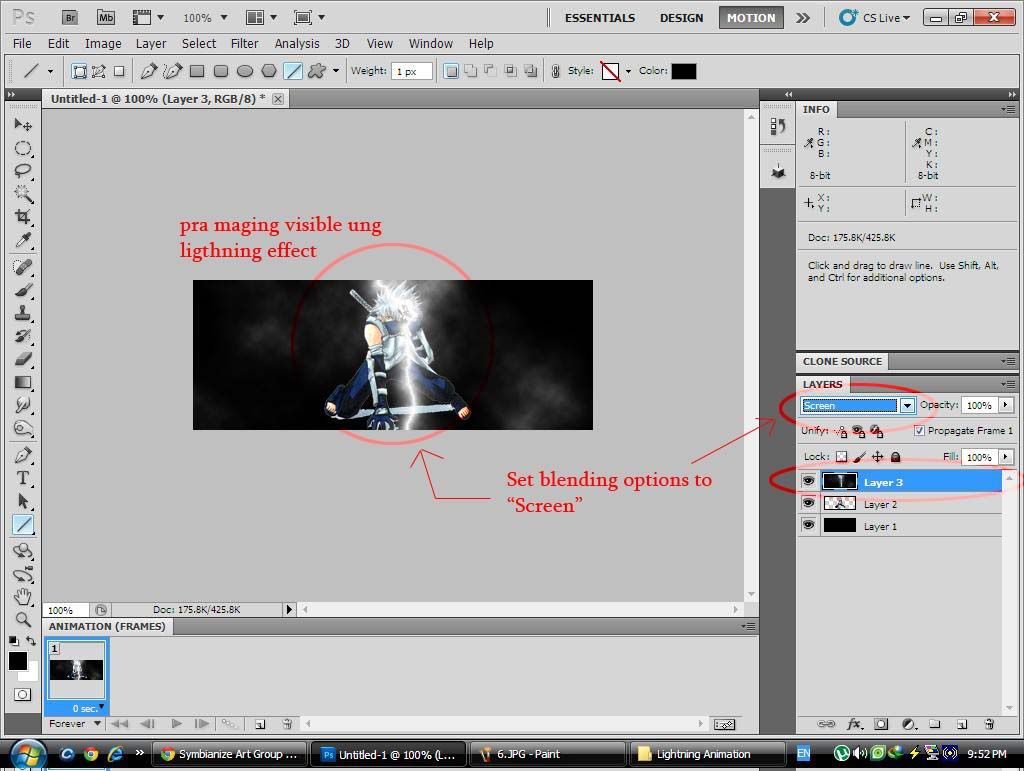
Step 7: Set the blending options nung Layer 3 to "Screen"
| This image has been resized. Click this bar to view the full image. The original image is sized 1024x771. |
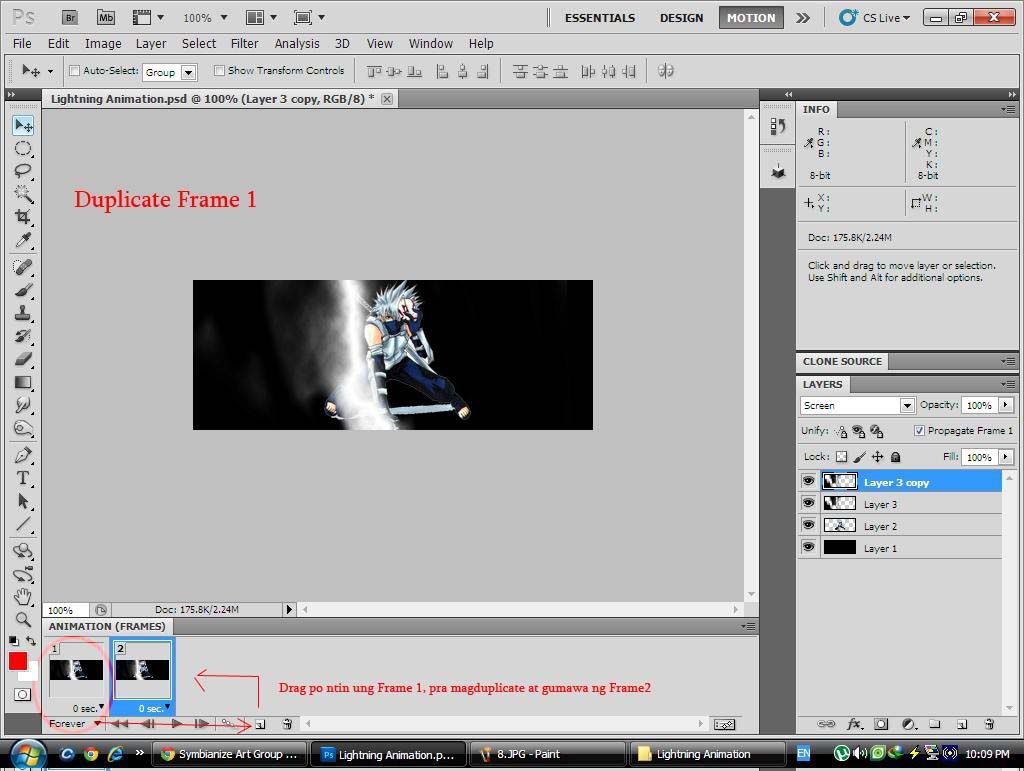
Step 8: Ipuwesto nyo kung saan nyo gus2 ung lightning, burahin n rin ang natitira pang puti-puti kung meron man
Then Duplicate nyo ung Layer 3
| This image has been resized. Click this bar to view the full image. The original image is sized 1024x771. |

Step 9: sa lower left corner, i-drag nyo ung Frame 1 pra maduplicate
| This image has been resized. Click this bar to view the full image. The original image is sized 1024x771. |
Step 10: Frame 1: Hide "Layer 3 Copy"
| This image has been resized. Click this bar to view the full image. The original image is sized 1024x771. |

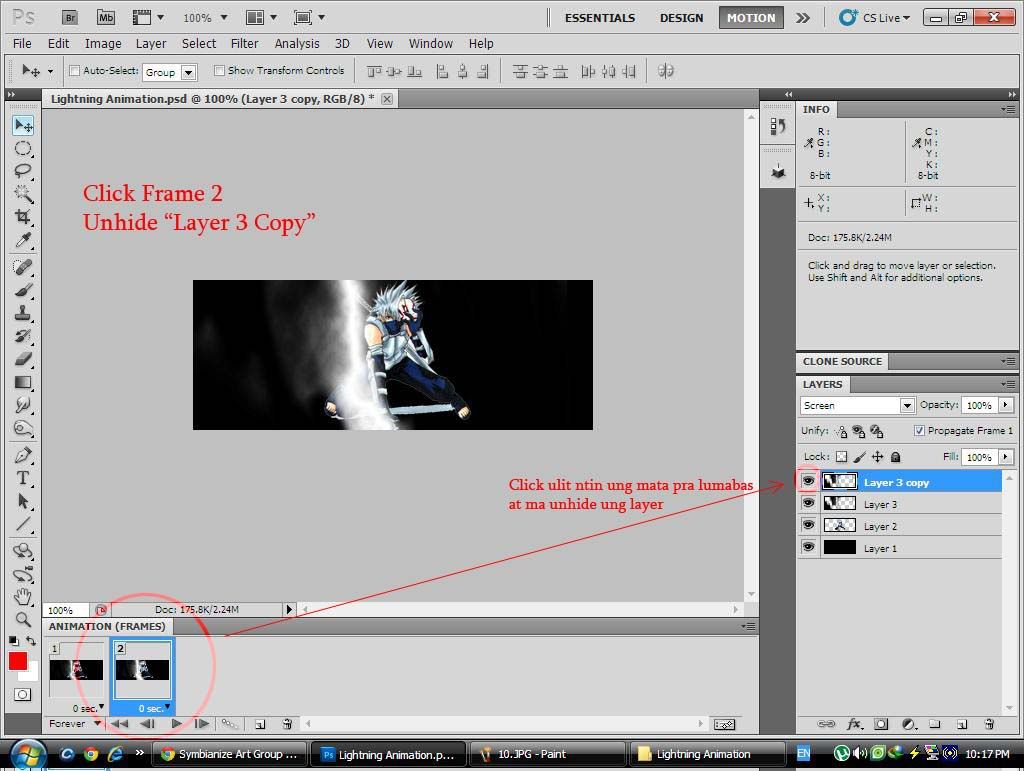
Step 11: Frame 2: Unhide "Layer 3 Copy"
| This image has been resized. Click this bar to view the full image. The original image is sized 1024x771. |
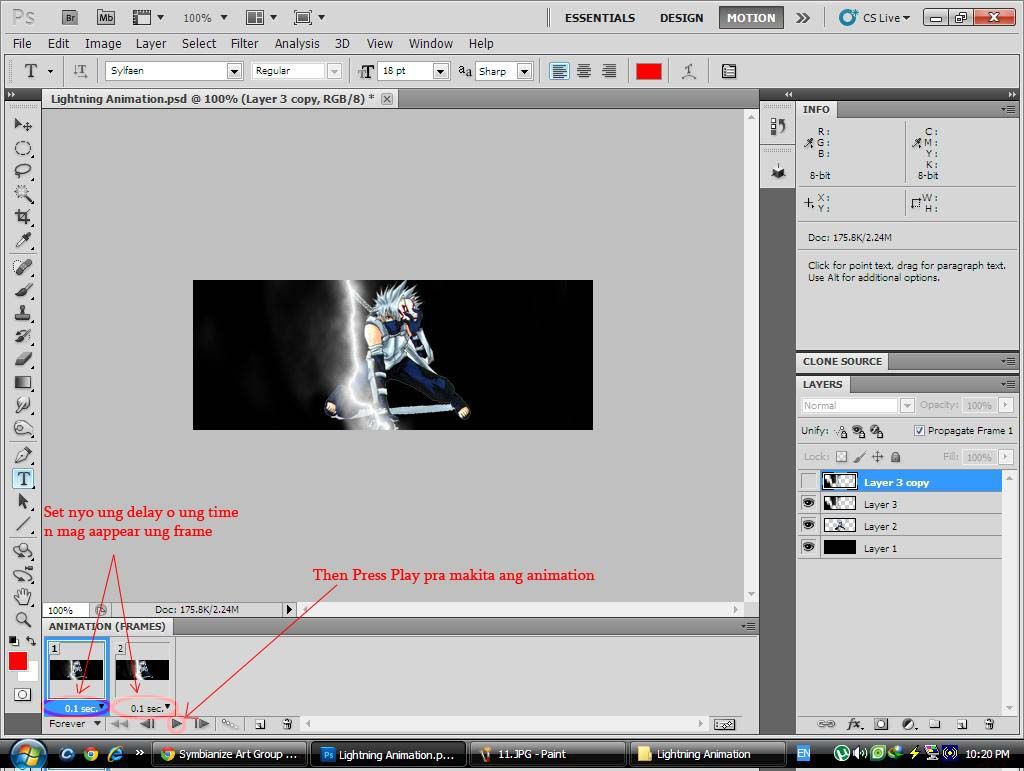
Step 12: Set nyo nlng ung delay then Play
| This image has been resized. Click this bar to view the full image. The original image is sized 1024x771. |
Output
Original

Dagdag lang konting lightning pa at ng konting details

Eto nmn ung sig na nilagyan ko ng lightning effect
Feedback nlng po
 , and feel free to post nung nagawa nyo d2
Enjoy the tutorial, Subscribe at alamin ang latest


0 comments:
Post a Comment