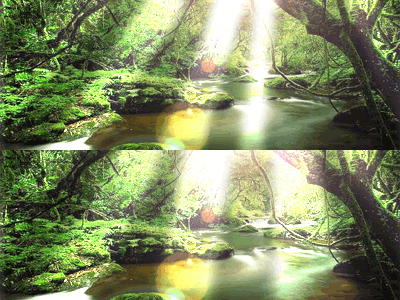
Sunbeam Effect
Stock:
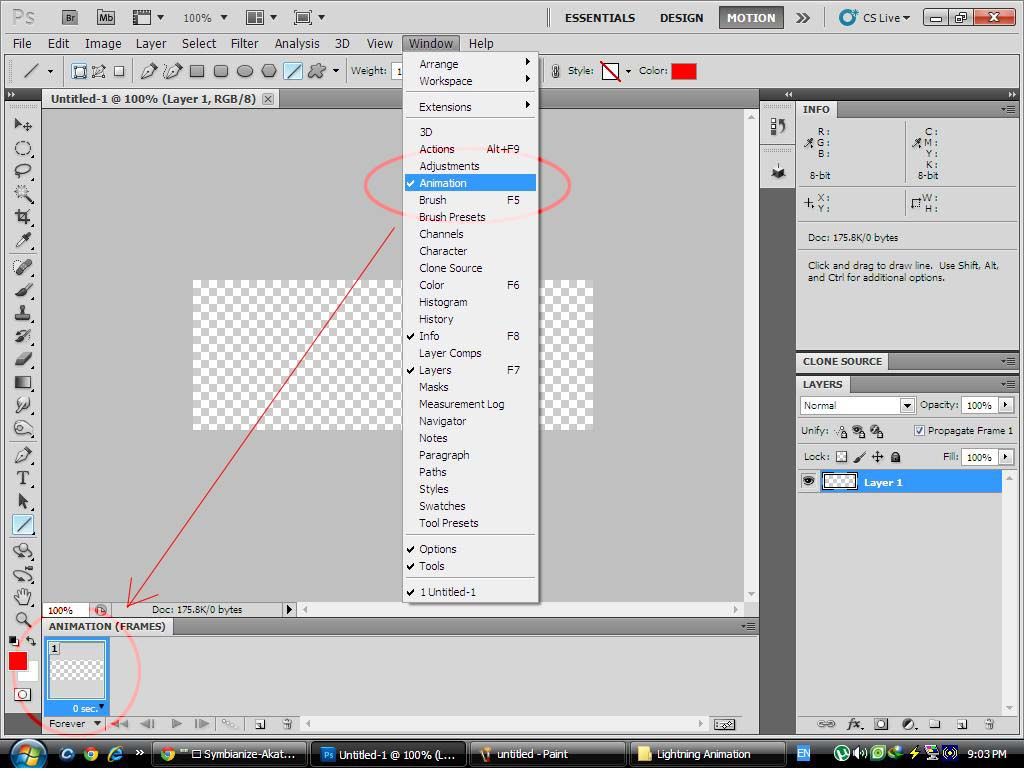
Step 1: Make sure po muna ntin n kasama ang "Animation" sa Window Set natin
See Post #19 kung hindi Frame ang nakikita nyo sa lower-left corner
Create New Document: 400 H x 150 W
| This image has been resized. Click this bar to view the full image. The original image is sized 1024x771. |
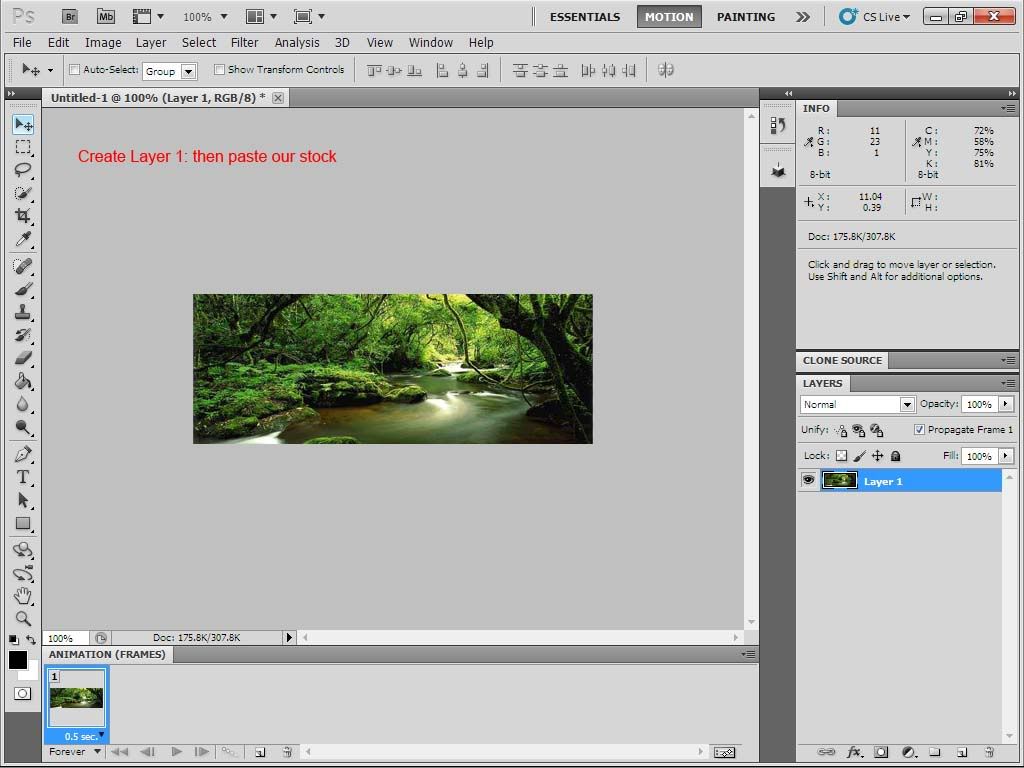
Step 2: Create Layer 1: Paste the stock
| This image has been resized. Click this bar to view the full image. The original image is sized 1024x768. |
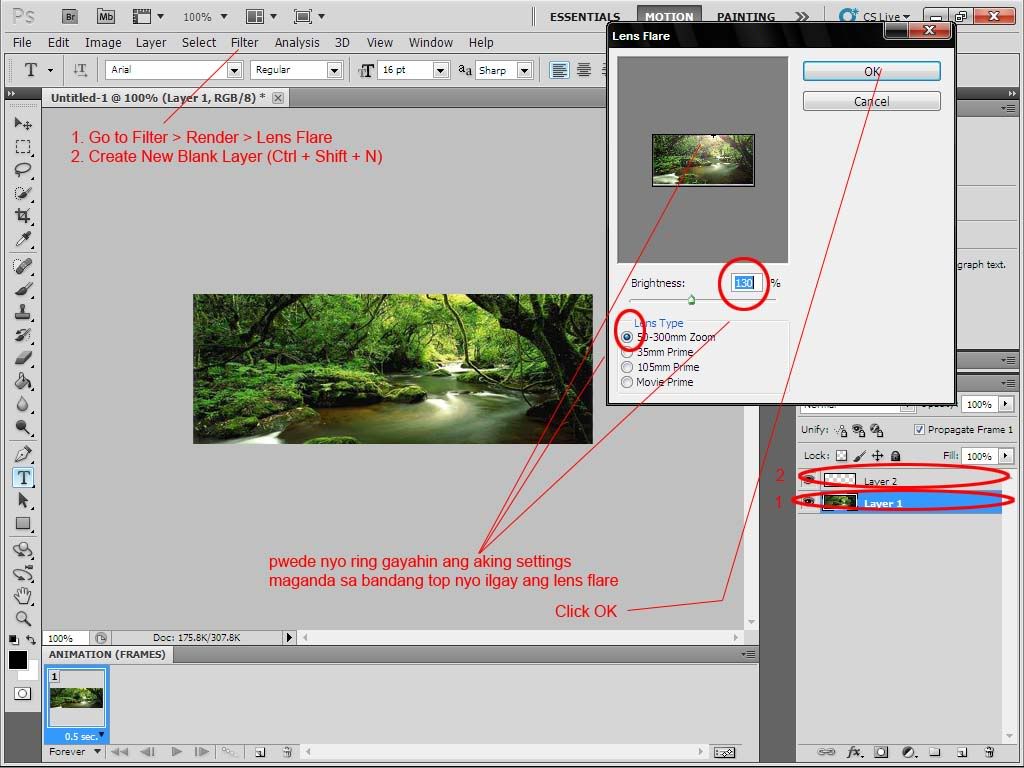
Step 3: Add Lens Flare
Create New Blank Layer
| This image has been resized. Click this bar to view the full image. The original image is sized 1024x768. |
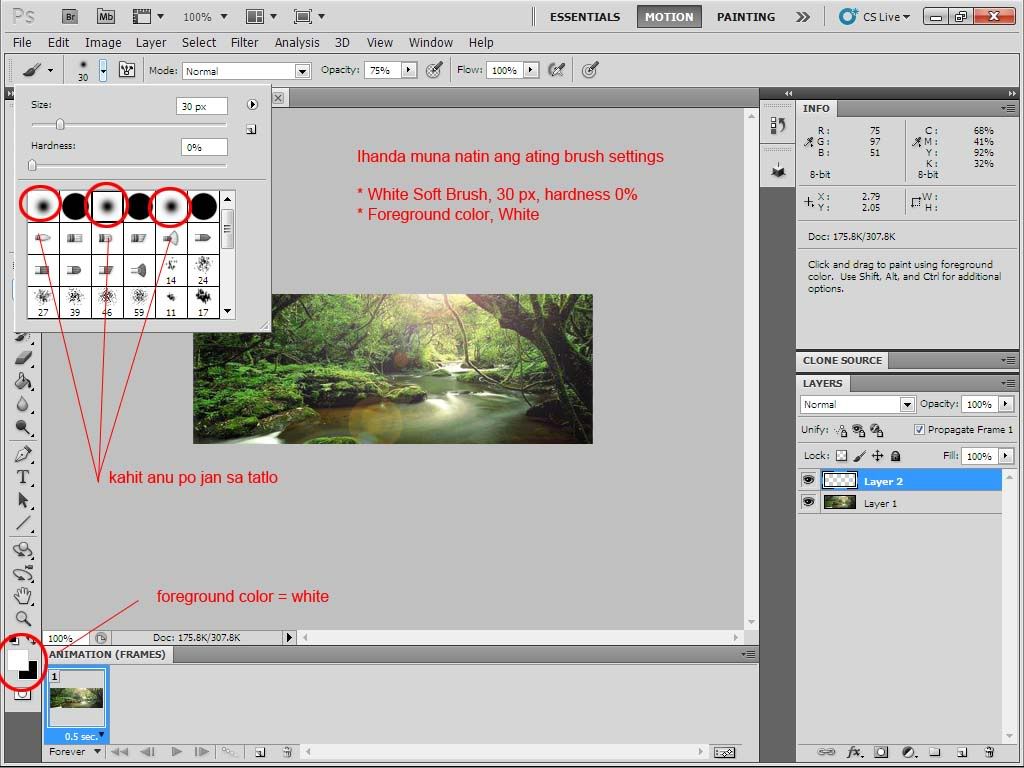
Step 4: Set brush settings
| This image has been resized. Click this bar to view the full image. The original image is sized 1024x768. |
Step 5: Layer 2: Draw the sunbeam effect
Set the blending options to Overlay
| This image has been resized. Click this bar to view the full image. The original image is sized 1024x768. |
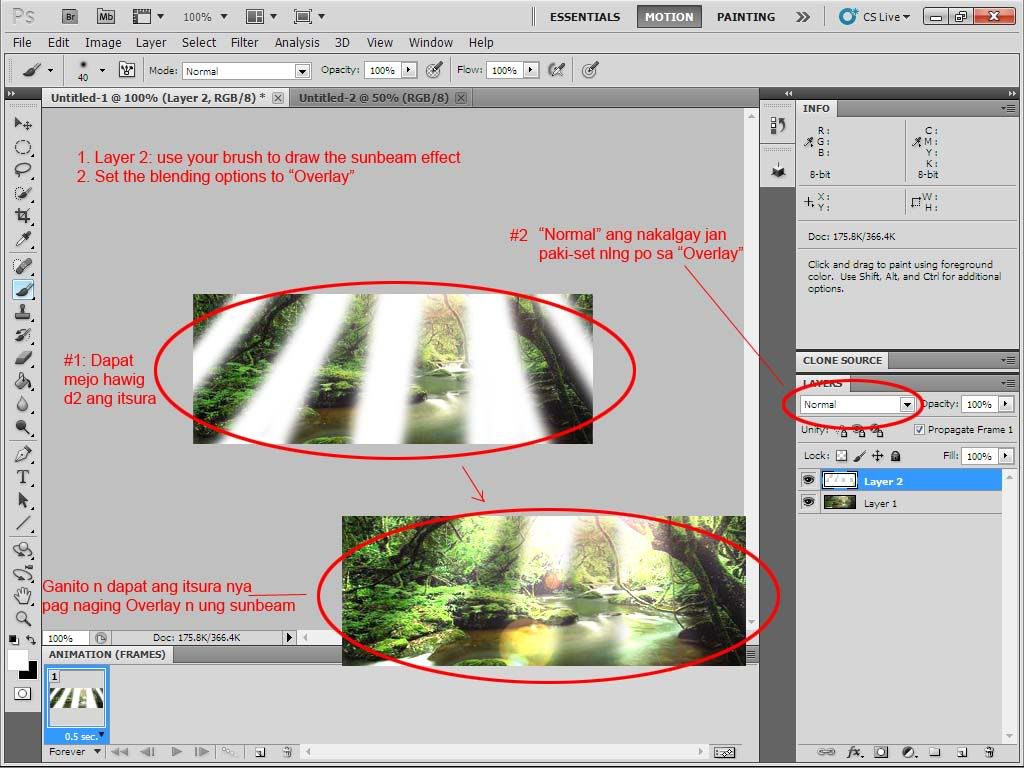
Step 6: Repeat Step 5
| This image has been resized. Click this bar to view the full image. The original image is sized 1024x768. |
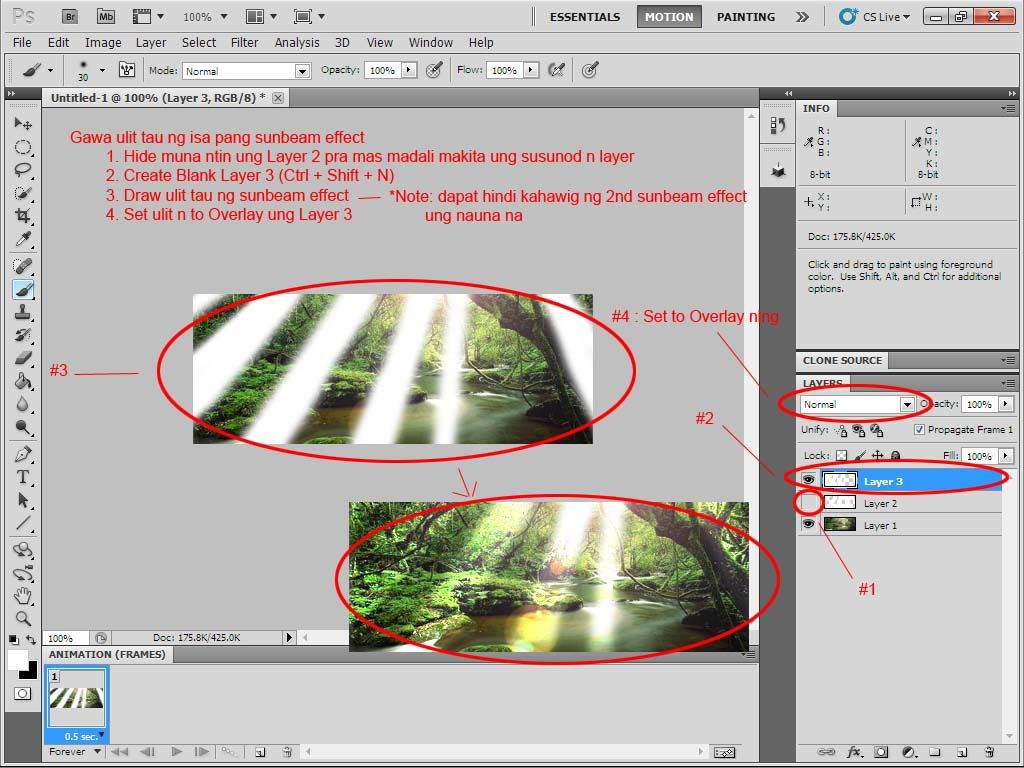
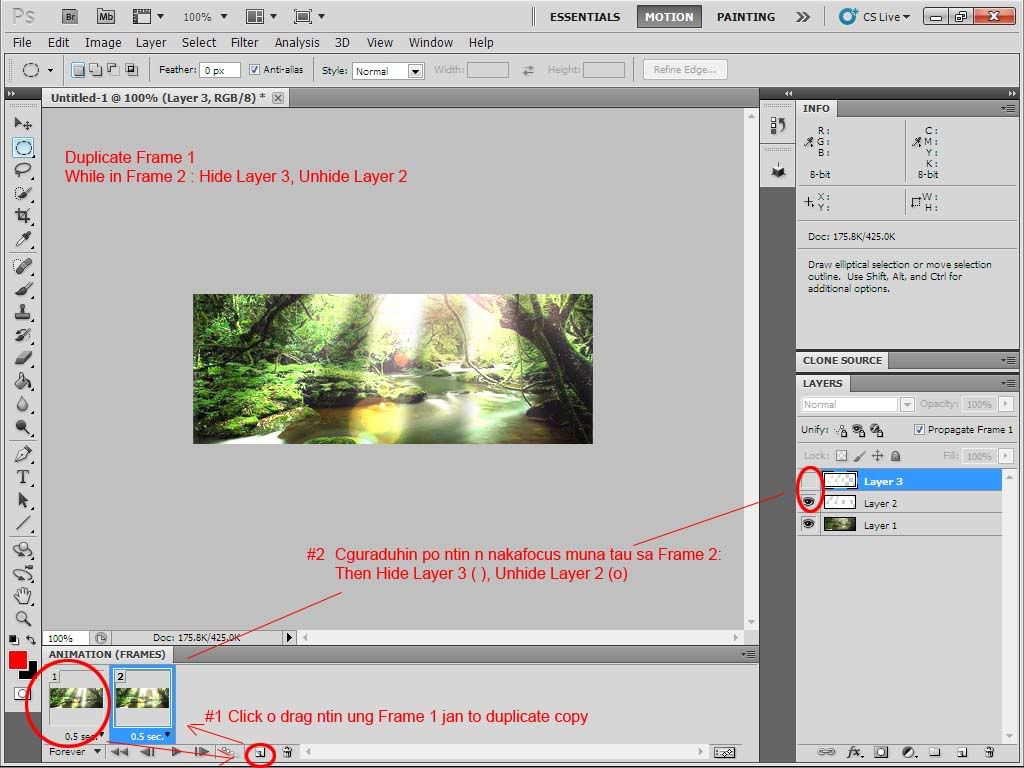
Step 7: Duplicate Frame 1
Frame 2: Hide Layer 3, Unhide Layer 2
| This image has been resized. Click this bar to view the full image. The original image is sized 1024x768. |
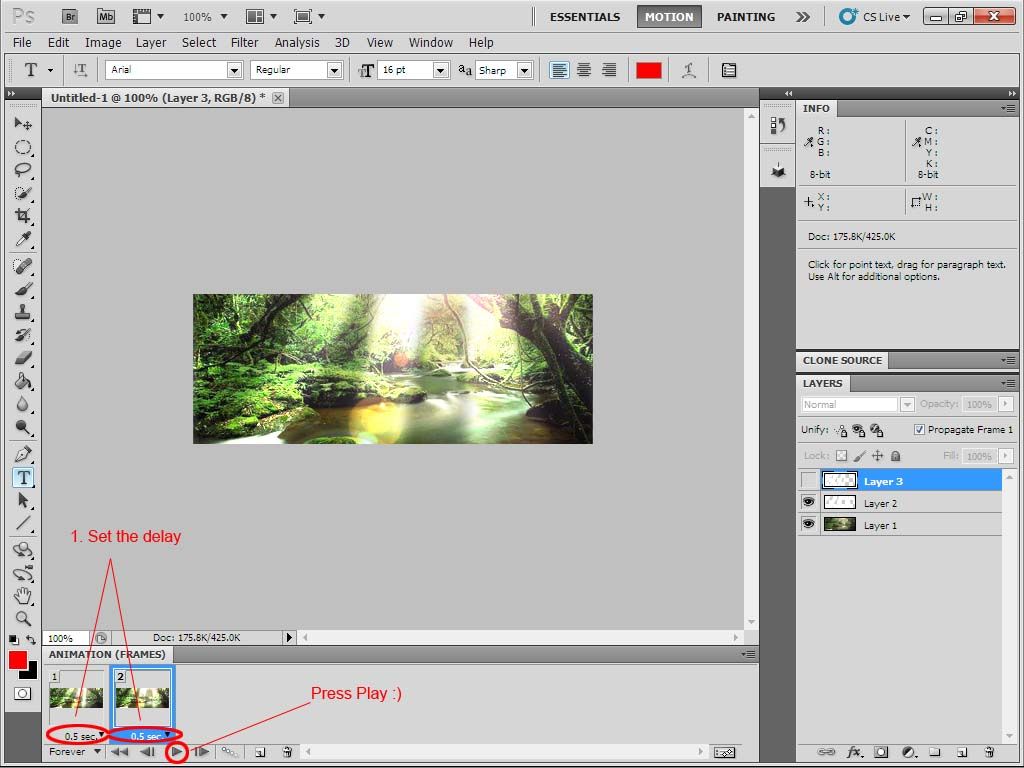
Step 8: Set the delay & Press Play

| This image has been resized. Click this bar to view the full image. The original image is sized 1024x768. |
Output:
Original


 1/07/2012 06:59:00 PM
 Photoshop

0 comments:
Post a Comment