

 1/07/2012 06:52:00 PM
 Photoshop

Sand Animation
Stock: (gaara.jpg)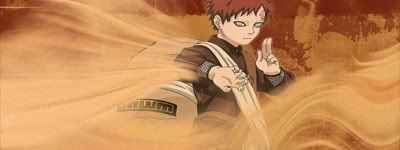
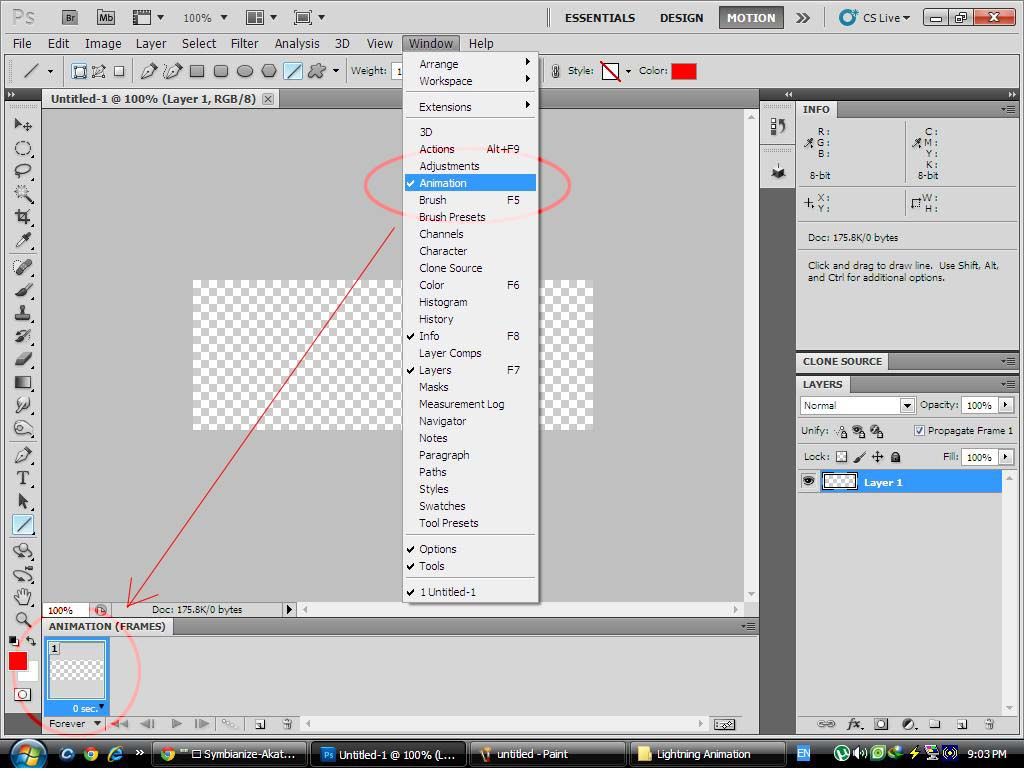
Step 1: Make sure po muna ntin n kasama ang "Animation" sa Window Set natin
See Post #19 kung hindi Frame ang nakikita nyo sa lower-left corner
Create New Document 400H x150W
| This image has been resized. Click this bar to view the full image. The original image is sized 1024x771. |
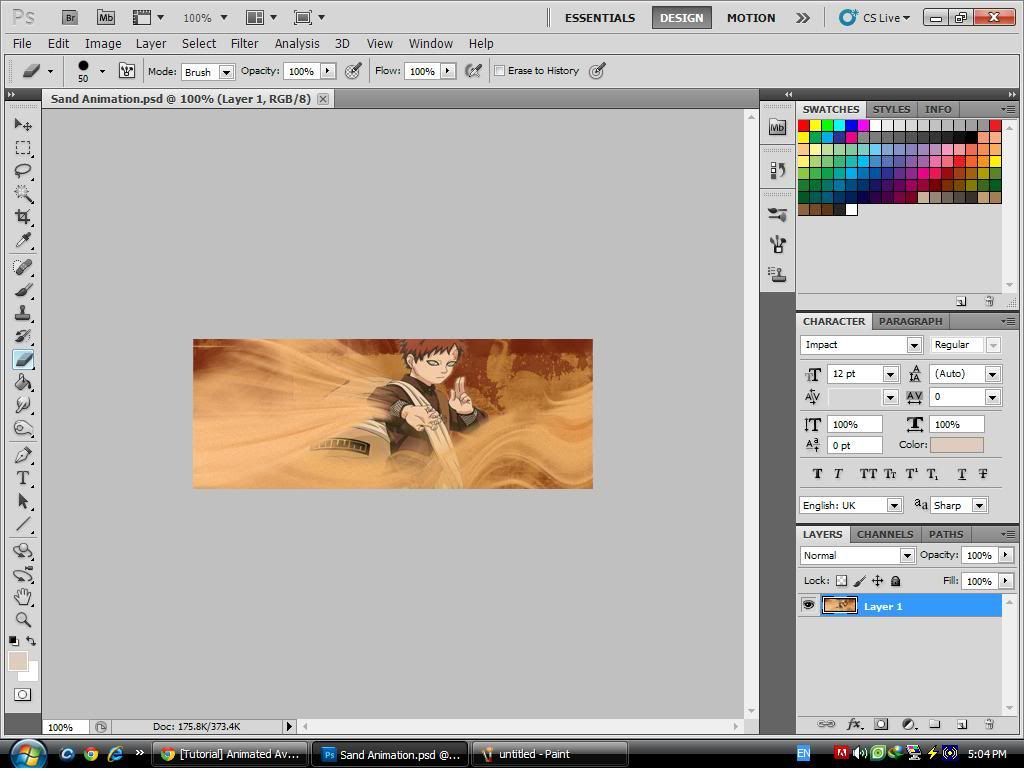
Step 2: Create New Layer: then ilagay ang ating stock (Gaara)
| This image has been resized. Click this bar to view the full image. The original image is sized 1024x771. |
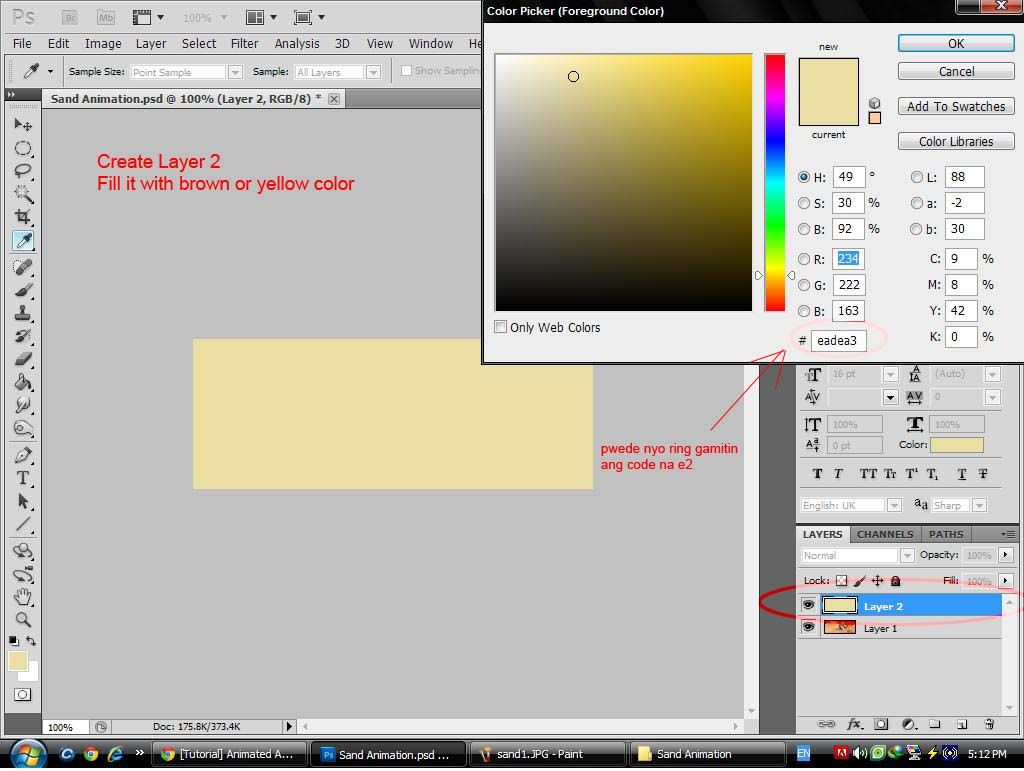
Step 3: Create Layer 2: Fill it w/ yellow or brown color
| This image has been resized. Click this bar to view the full image. The original image is sized 1024x771. |
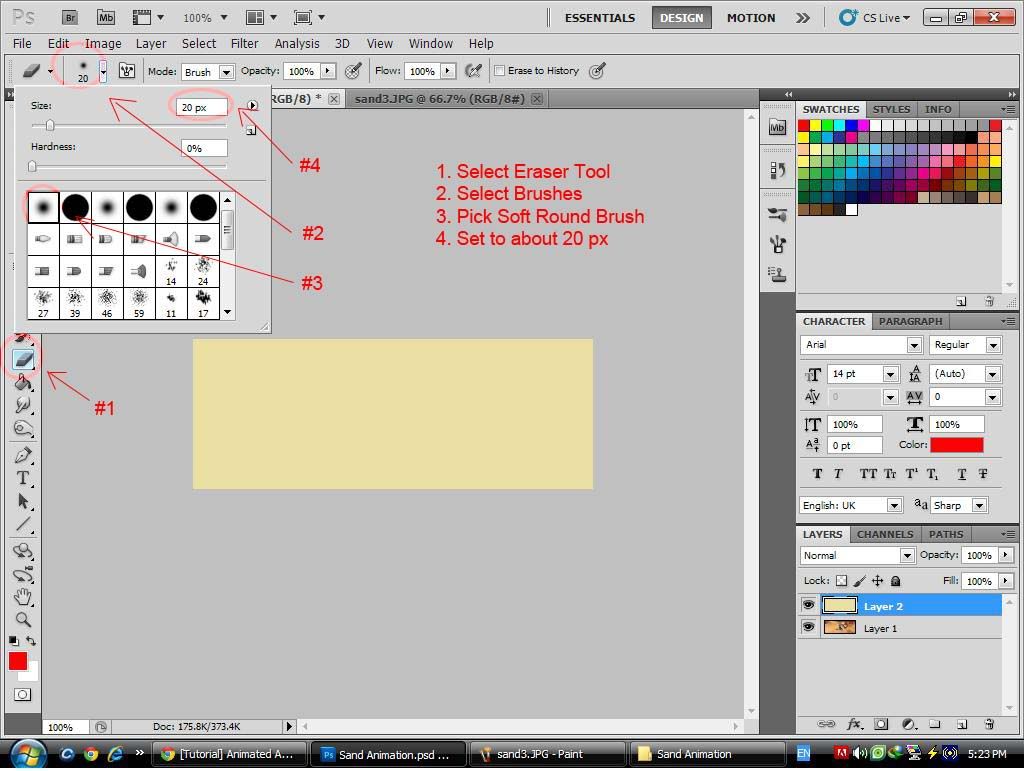
Step 4: Select Eraser Tool, SoftBrush 20px
| This image has been resized. Click this bar to view the full image. The original image is sized 1024x771. |
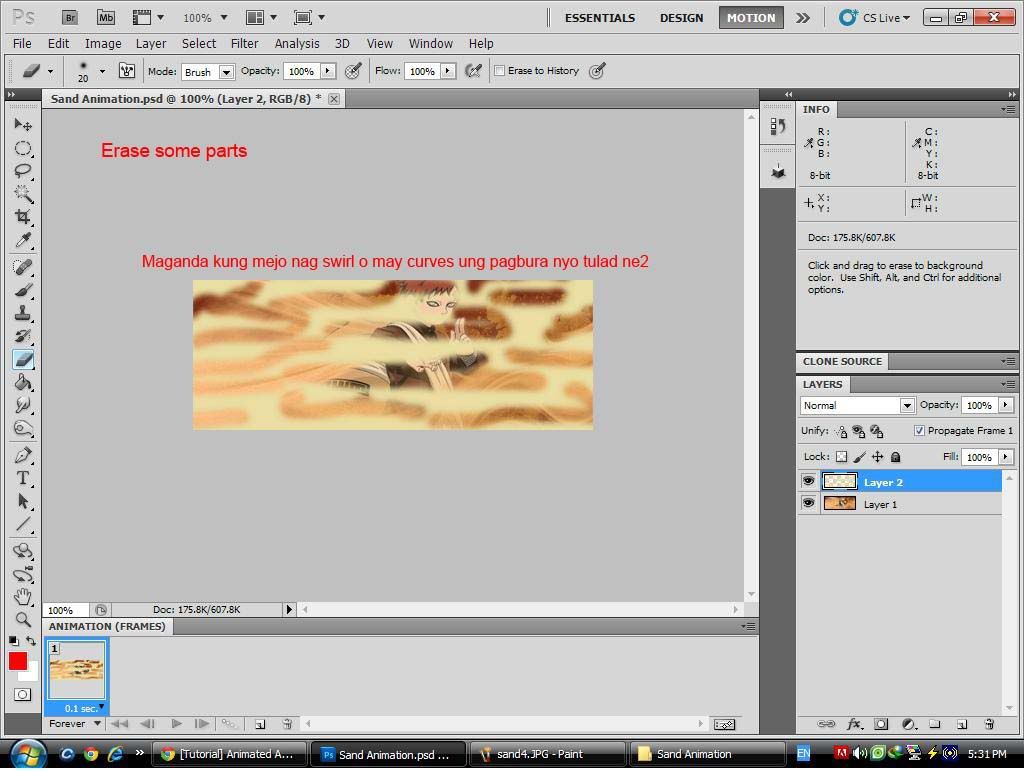
Step 5: Use the Eraser Tool to erase some parts
| This image has been resized. Click this bar to view the full image. The original image is sized 1024x771. |
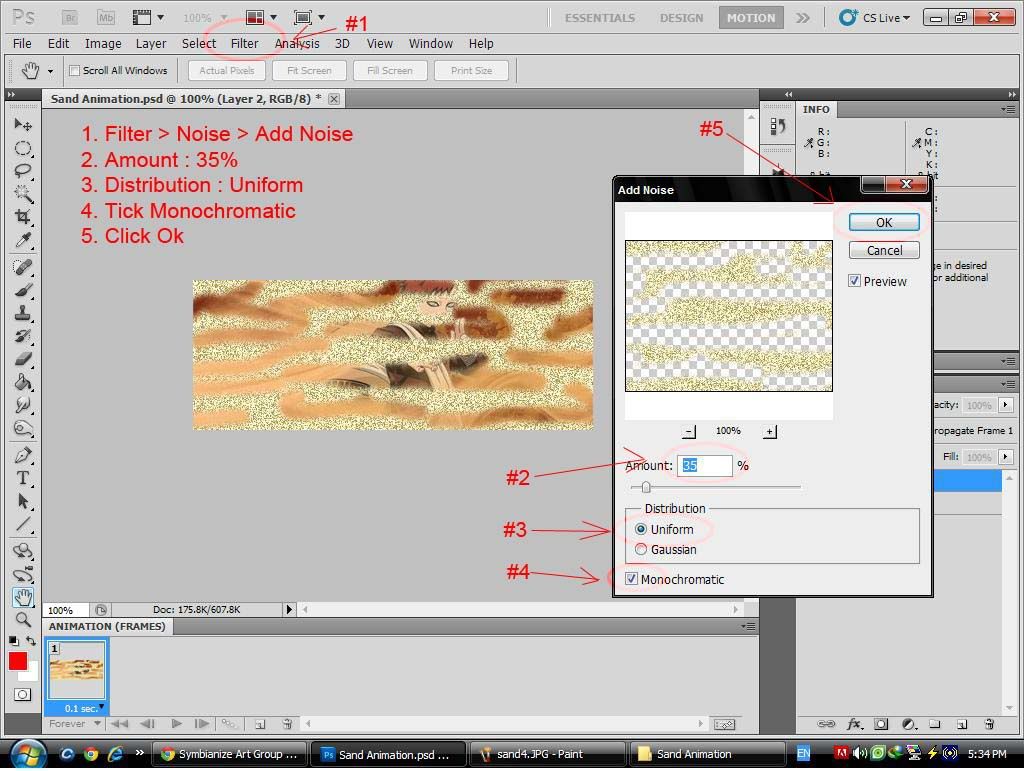
Step 6: Add Noise Filter: 35%/Distribution/Monochromatic
| This image has been resized. Click this bar to view the full image. The original image is sized 1024x771. |
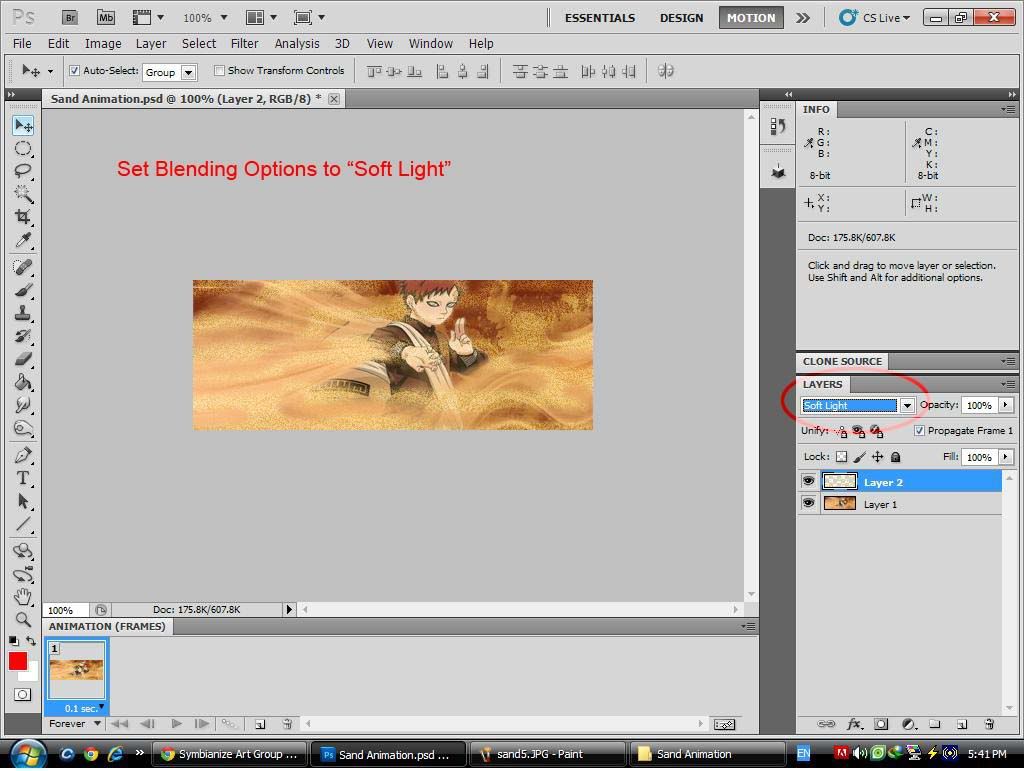
Step 7: Set Layer 2 Blending Options to Soft Light
| This image has been resized. Click this bar to view the full image. The original image is sized 1024x771. |
Step 8: Stretch the sand effect
| This image has been resized. Click this bar to view the full image. The original image is sized 1024x771. |

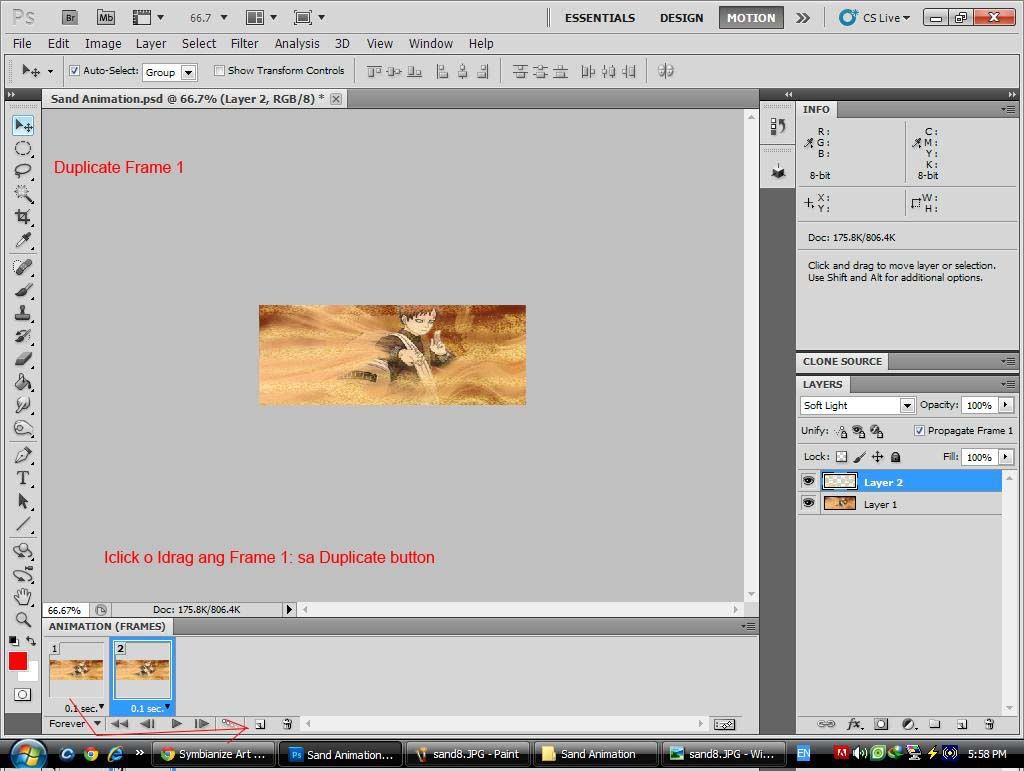
Step 9: Duplicate Frame 1
| This image has been resized. Click this bar to view the full image. The original image is sized 1024x771. |
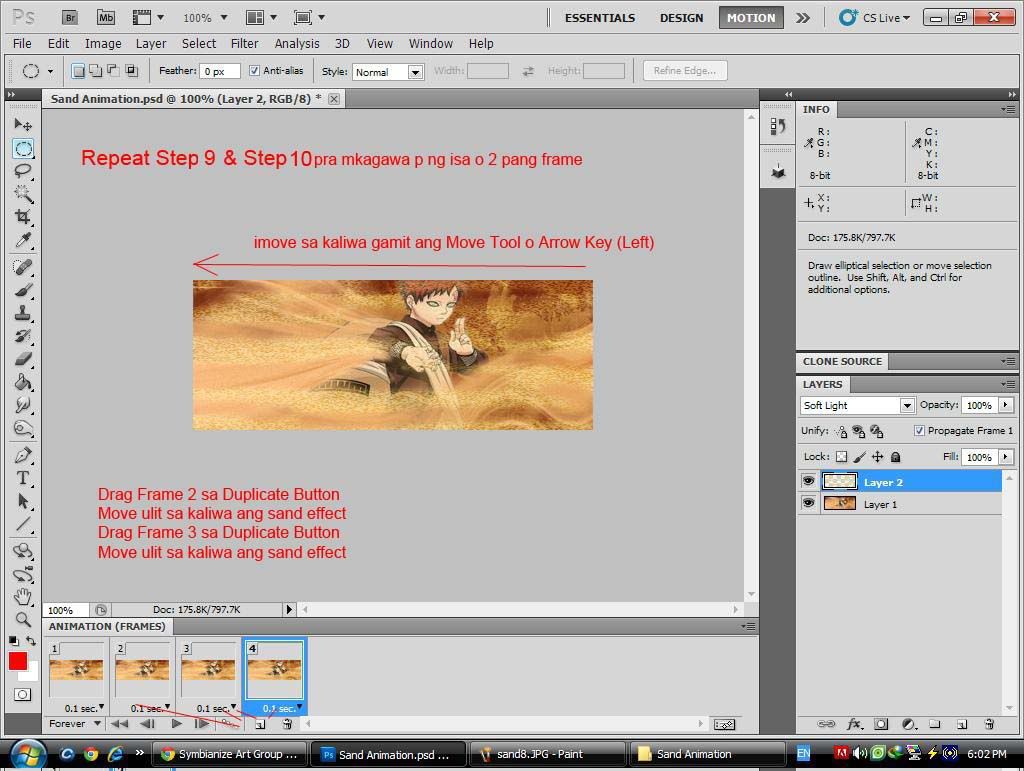
Step 10: Move the Sand Effect <-
| This image has been resized. Click this bar to view the full image. The original image is sized 1024x771. |

Step 11: Repeat Step 9 & 10 to create another frames
| This image has been resized. Click this bar to view the full image. The original image is sized 1024x771. |
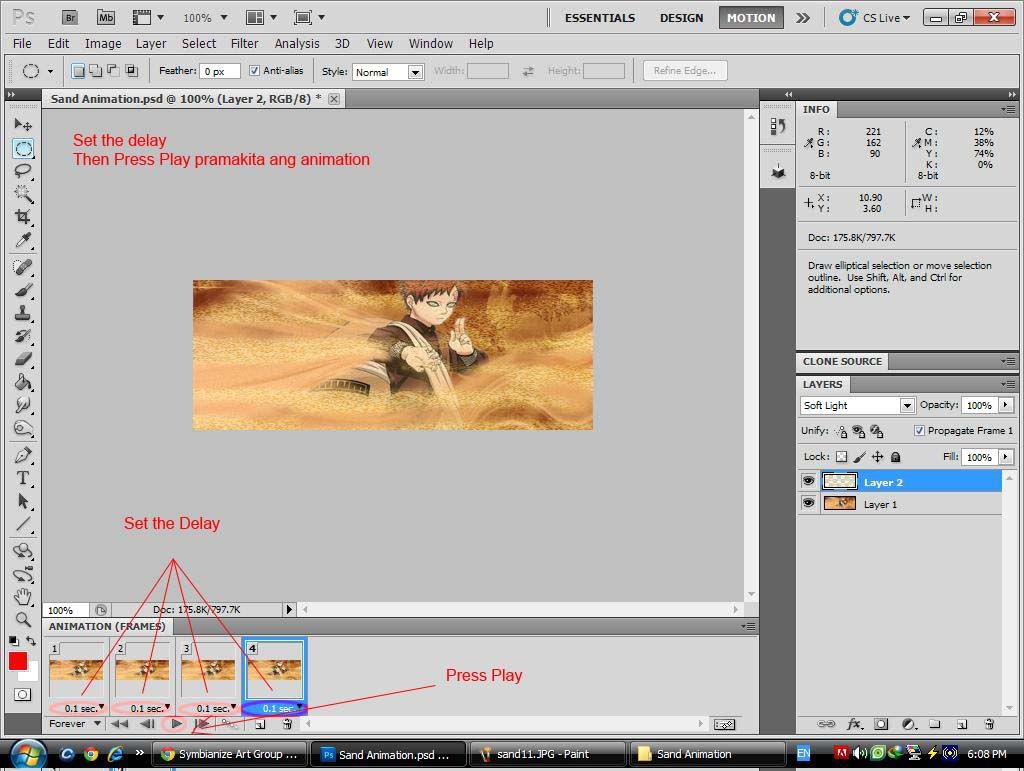
Step 12: Set the delay then press play

| This image has been resized. Click this bar to view the full image. The original image is sized 1024x771. |
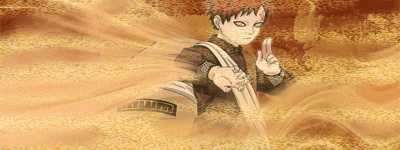
Output
Feedback nlng po
 , and feel free to post nung nagawa nyo d2
Enjoy the tutorial, Subscribe at alamin ang latest


0 comments:
Post a Comment